DIY Project: Bunkbeds
The bunk beds I originally purchased for my boys’ bedroom diorama ended up being too big, and none of the options I found online were suitable. So I decided to make it myself.
Materials: clear tacky glue, mini wooden pallets, large and small popsicle sticks, square dowels, I got most pieces from the craft aisle at Dollar Tree and the woodworking department at Hobby Lobby. Tools: jumbo binder clips for holding parts in place while drying; emery board for sanding cut edges; Exacto blade, scissors, and small saw for cutting the wood when needed; ruler and pencil.
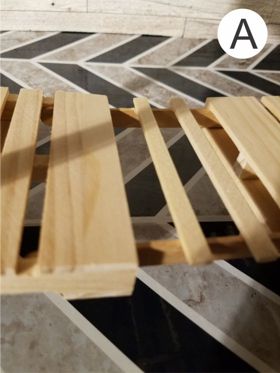
The platform of each bed is made from two mini pallets connected by two skinny popsicle sticks. I slid the two pallets to the length I needed and glued the connecting sticks into place. To prevent the mattress from sagging into the gap, I glued two more evenly spaced on top of the extender sticks. (picture A)
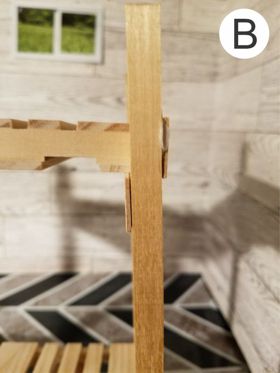
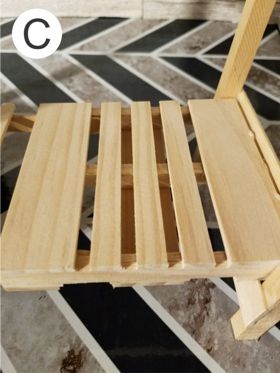
I cut a square wood dowel to make the bed posts and spaced them to allow the pallets to slide into place. Large popsicle sticks cut to size glued to opposing sides and staggered as pictured act as braces for the mattress platforms. (pictures B and C)
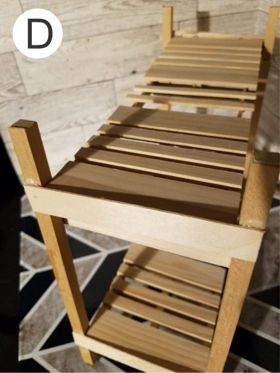
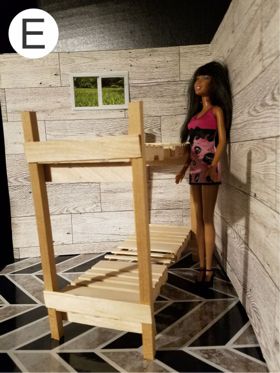
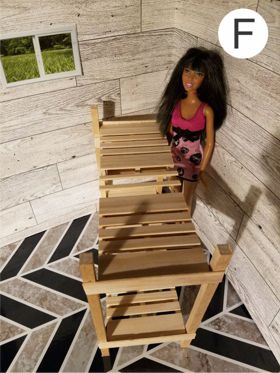
Once all the pieces were done, I assembled the bunk bed and glued each piece into place. (picture D) This project took about two days to allow the glue to dry at each stage, and turned out better than I thought it would. (pictures E and F)
Tags
- Thought of the Month (70)
- Playscale Emporium Tips (9)
- FAECO News Commentary (4)
- My Soapbox (2)
Archives
- February 2026 (1)
- January 2026 (2)
- December 2025 (1)
- November 2025 (1)
- October 2025 (2)
- September 2025 (1)
- August 2025 (1)
- July 2025 (1)
- June 2025 (1)
- May 2025 (1)


Comments
Post new comment